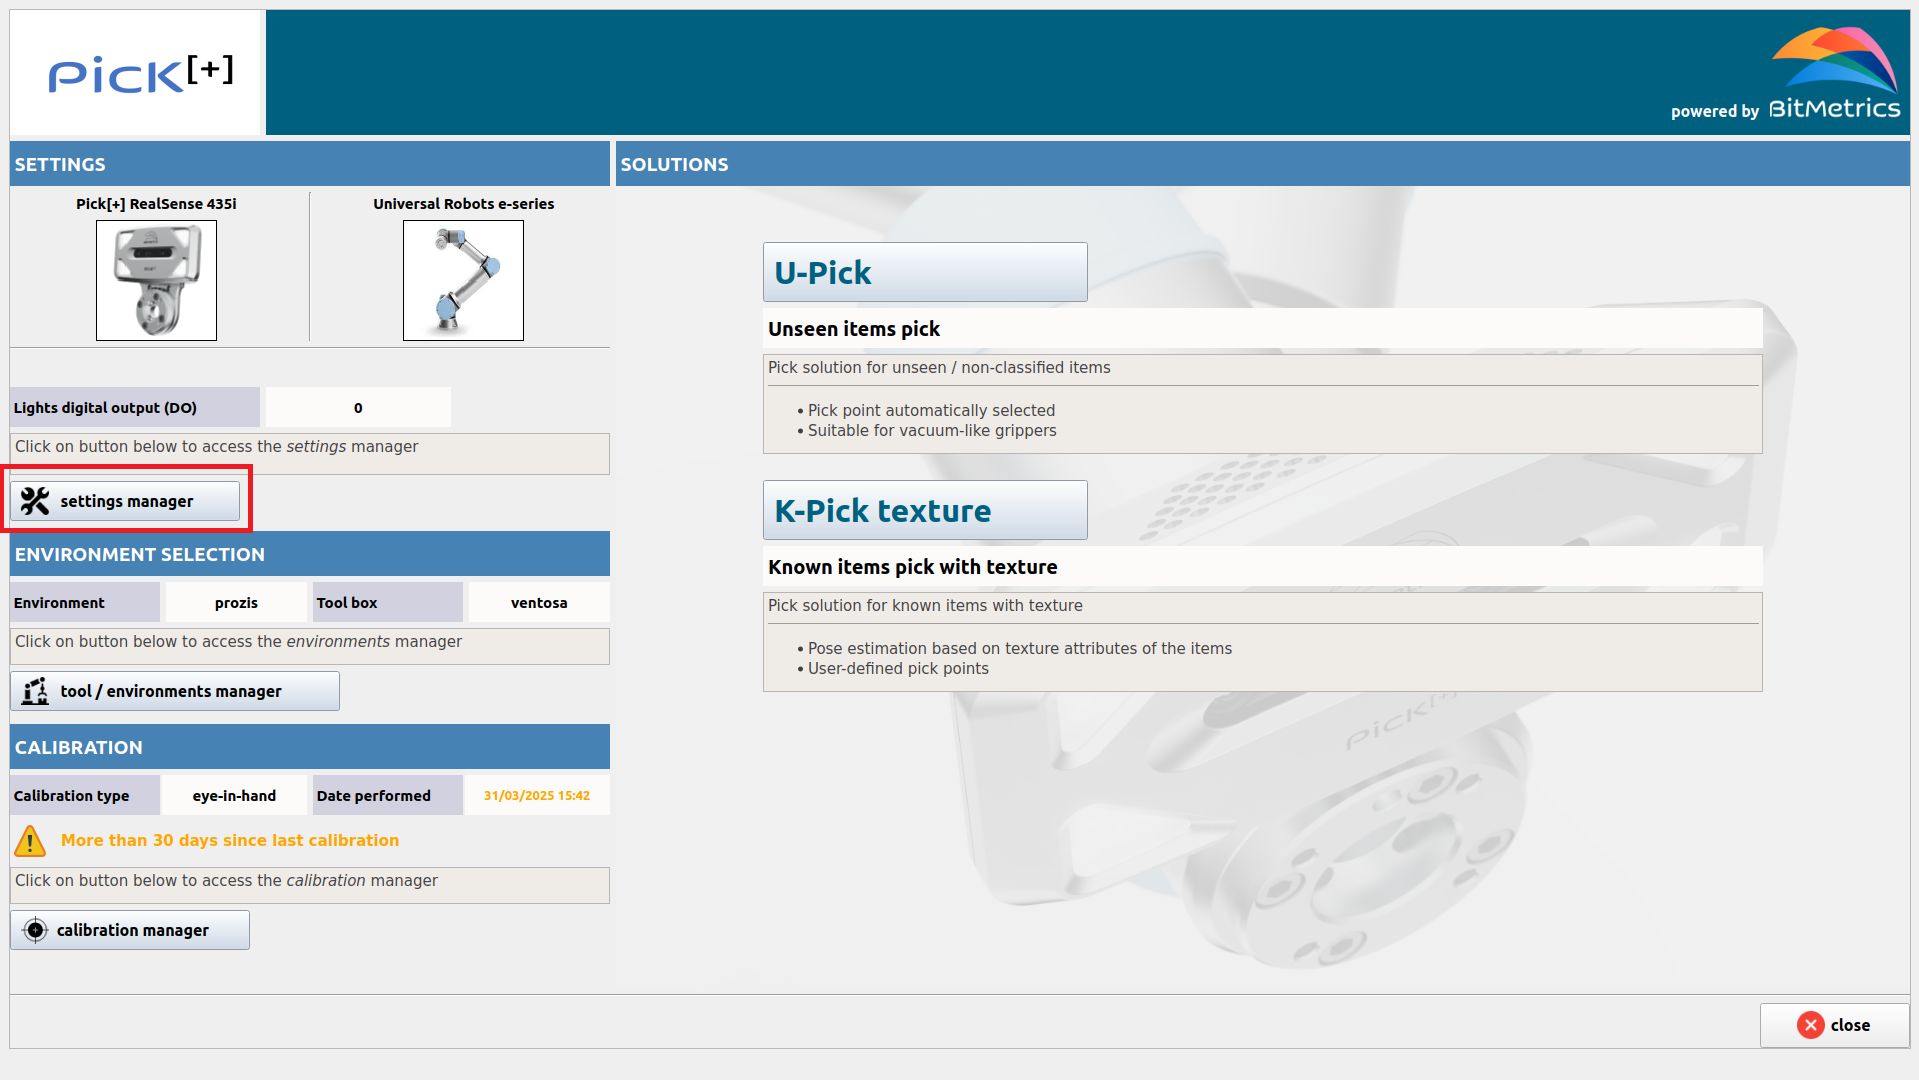
Settings
The Settings page is where you define your hardware configuration for Pick[+]. You'll choose how the camera and robot are paired, select your robot and camera models, set up lighting, and configure your end-effector (tool). These values apply globally to every application you build.
To access this panel, open Pick[+] and click the Settings Manager button on the Homepage.
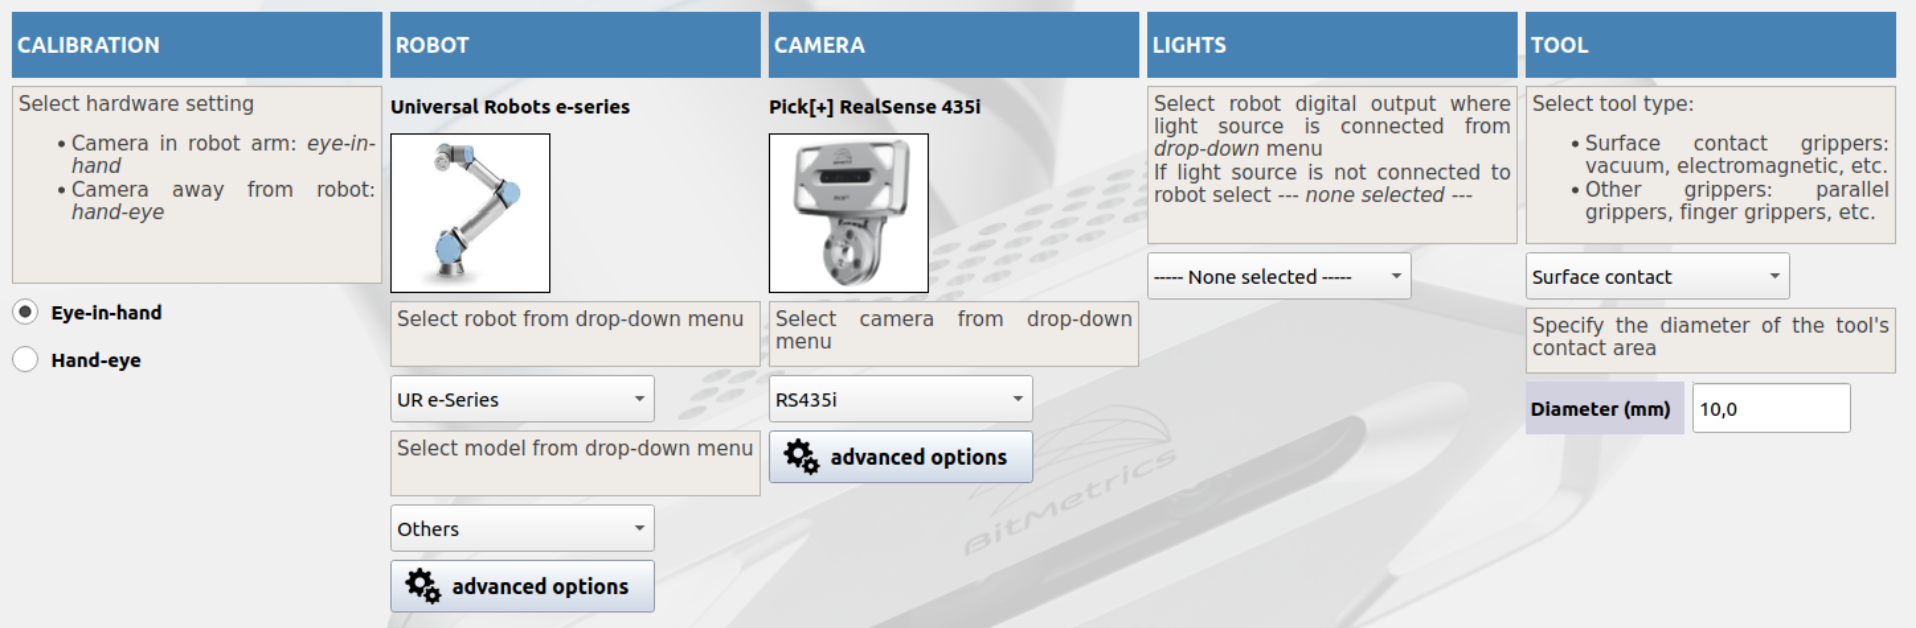
1. Calibration
Choose how the camera is mounted relative to the robot:
-
Eye-in-hand
The camera is attached directly to the robot's flange. Use this for on-arm vision. -
Hand-eye
The camera is mounted off-board (e.g. on a fixed bracket). Use this for static-camera setups.
Select the calibration size of your calibration plate (check Pick[+] Components). There are 2 possible sizes:
- Original
- Compact
2. Robot
Select your robot brand and model so Pick[+] can compute reachable workspaces and motion scripts:
-
Robot Manufacturer dropdown
Choose your robot brand. -
Model dropdown
Pick the exact model (UR3e, UR5e, UR10e, UR16e, etc.).
Advanced options
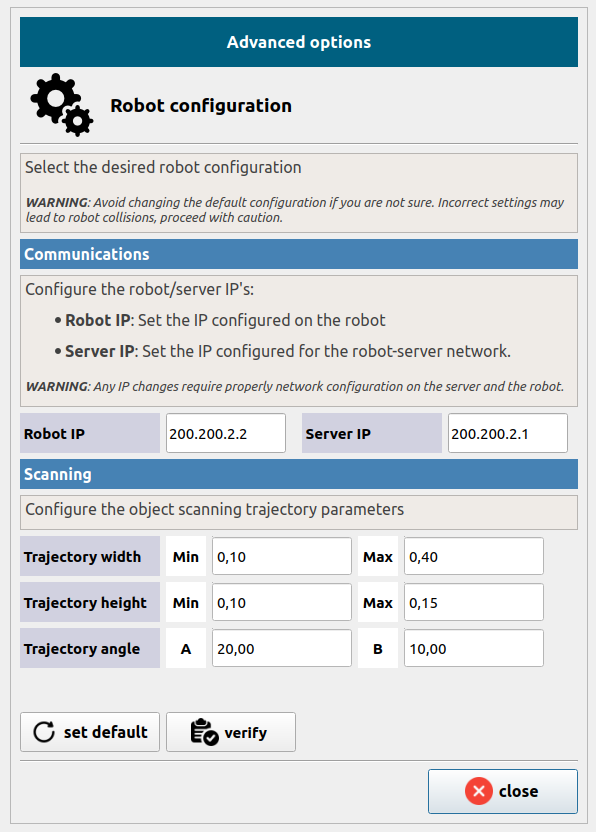 Communications
Configure the network addresses for robot communication:
- Robot IP: The IP address configured on the robot controller (default:
200.200.2.2) - Server IP: The IP address configured for the PC server network (default:
200.200.2.1)
These default values are preconfigured for standard Pick[+] deployments. If you need to change them, follow the complete IP Configuration guide to ensure all components are updated consistently.
Scanning Trajectory
Define the camera's scanning path parameters (in meters and degrees). Default values:
- Trajectory width: Min
0.10/ Max0.40 - Trajectory height: Min
0.10/ Max0.15 - Trajectory angle: A
20.00/ B10.00
These parameters are optimized for typical workpieces. Adjustments may be necessary for exceptionally large objects, but should only be modified by experienced users familiar with scan path planning.
3. Camera
Tell Pick[+] which vision sensor you're using:
- Camera dropdown
Select Pick[+] RealSense D435i, Zivid 2+, or your chosen device.
Advanced options
 Exposure
Control the camera's exposure during calibration, scanning, and execution:
- Auto exposure: When enabled, the camera automatically adjusts exposure to match ambient lighting conditions. Disable it if you need consistent, repeatable results.
- Exposure time (µs): When auto exposure is disabled, set the exposure manually. The default value is
60000 µs. Increase it if images appear too dark; decrease it if they appear too bright or washed out.
Configuration file
For advanced control, you can create a custom camera profile using the RealSense Viewer (available from the PC terminal) and export it as a .json configuration file. Upload it here to apply the full profile to Pick[+], overwriting any manual exposure settings.
- Upload: Load a previously saved configuration file.
- Remove: Clear the loaded configuration and return to manual settings.
- Download: Export the current configuration file.
Avoid changing the default configuration unless you are familiar with RealSense camera settings.
4. Lights
Configure your illumination channel:
-
Digital Output (DO) dropdown
Select the robot's I/O line that drives your light source (e.g., LED ring). -
None selected
Use this if no external light is connected.
If you don't choose a channel, external lights will not toggle during scans.
5. Tool
Set up your gripper or end-effector so Pick[+] can avoid collisions:
- Tool type dropdown
- Surface contact grippers (vacuum cups, electromagnets)
-
Other grippers (parallel grippers, finger grippers, etc.)
-
Diameter (mm) input
For surface-contact tools, enter the cup diameter to define the grip area.
- Advanced options (optional)
Save your changes by clicking Save Changes at the bottom of the page.
Once saved, these settings are applied to all your Pick[+] applications.